
This incredibly basic gluten free yoghurt pizza dough idea was suggested on a gluten free Facebook group that I’m on and obviously, being so easy, it immediately caught my eye. If there’s one thing I love, it’s short cuts. You present me with anything that can make life easier and I’m on it like a vampire looking for blood! lol
And so what better than having a delicious, perfect, homemade gluten free pizza that requires very little time and ingredients? Sounds too good to be true?
I thought so too, but this recipe didn’t disappoint! What was meant to be just a quick experiment ended up earning a spot in my top favourite gluten free pizza bases! And it’s not just because of how effortless it is, but everything from the taste to the texture are perfect – good flavour, soft, yet slightly crispy on the outside. It’s just right; a fact also supported by my gluten eating non-coeliac boyfriend (and that’s always the ultimate test isn’t it!? lol).
Cost-wise, it’s so very cheap to make as well. I honestly don’t see myself buying overpriced pre-made pizzas as much as I used to after making this discovery.
It’s also worth mentioning that the dough is very easy to handle. Gluten free dough can sometimes be so sticky due to needing more liquid than ‘normal’ dough and that can make the rolling/spreading process a total pain in the a** at times, but I had no such issue with this recipe.
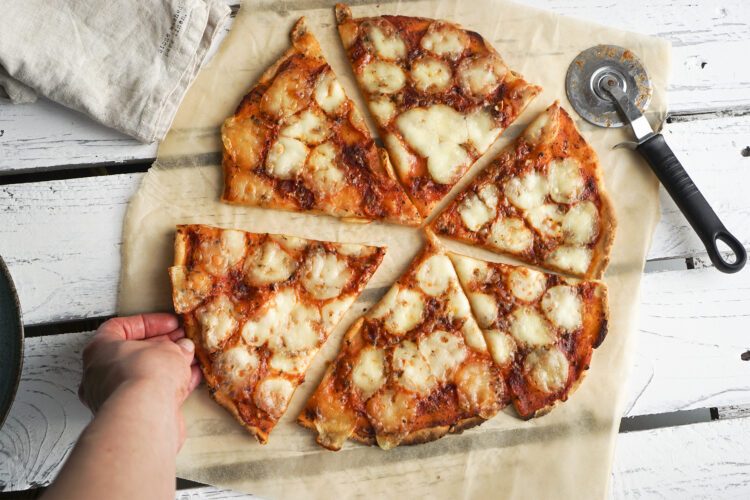
UPDATE (17.01.2021): I added a CRISPY THIN CRUST version! 🙂
The ingredients haven’t changed, except using a little extra flour to knead and spread the dough. It’s mainly the preparation/cooking method that’s been updated. You see, I posted this recipe YEARS ago and I’ve learned so much since then… 😉
I left the deep pan version up for those who prefer it, but this one is a major improvement in my opinion.
P.S.: I also used ASDA gluten free self-raising flour for this version and it worked brilliantly! I highly recommend it. Plus, it’s been priced at only 33p for ages which is an insane bargain!
 |
 |
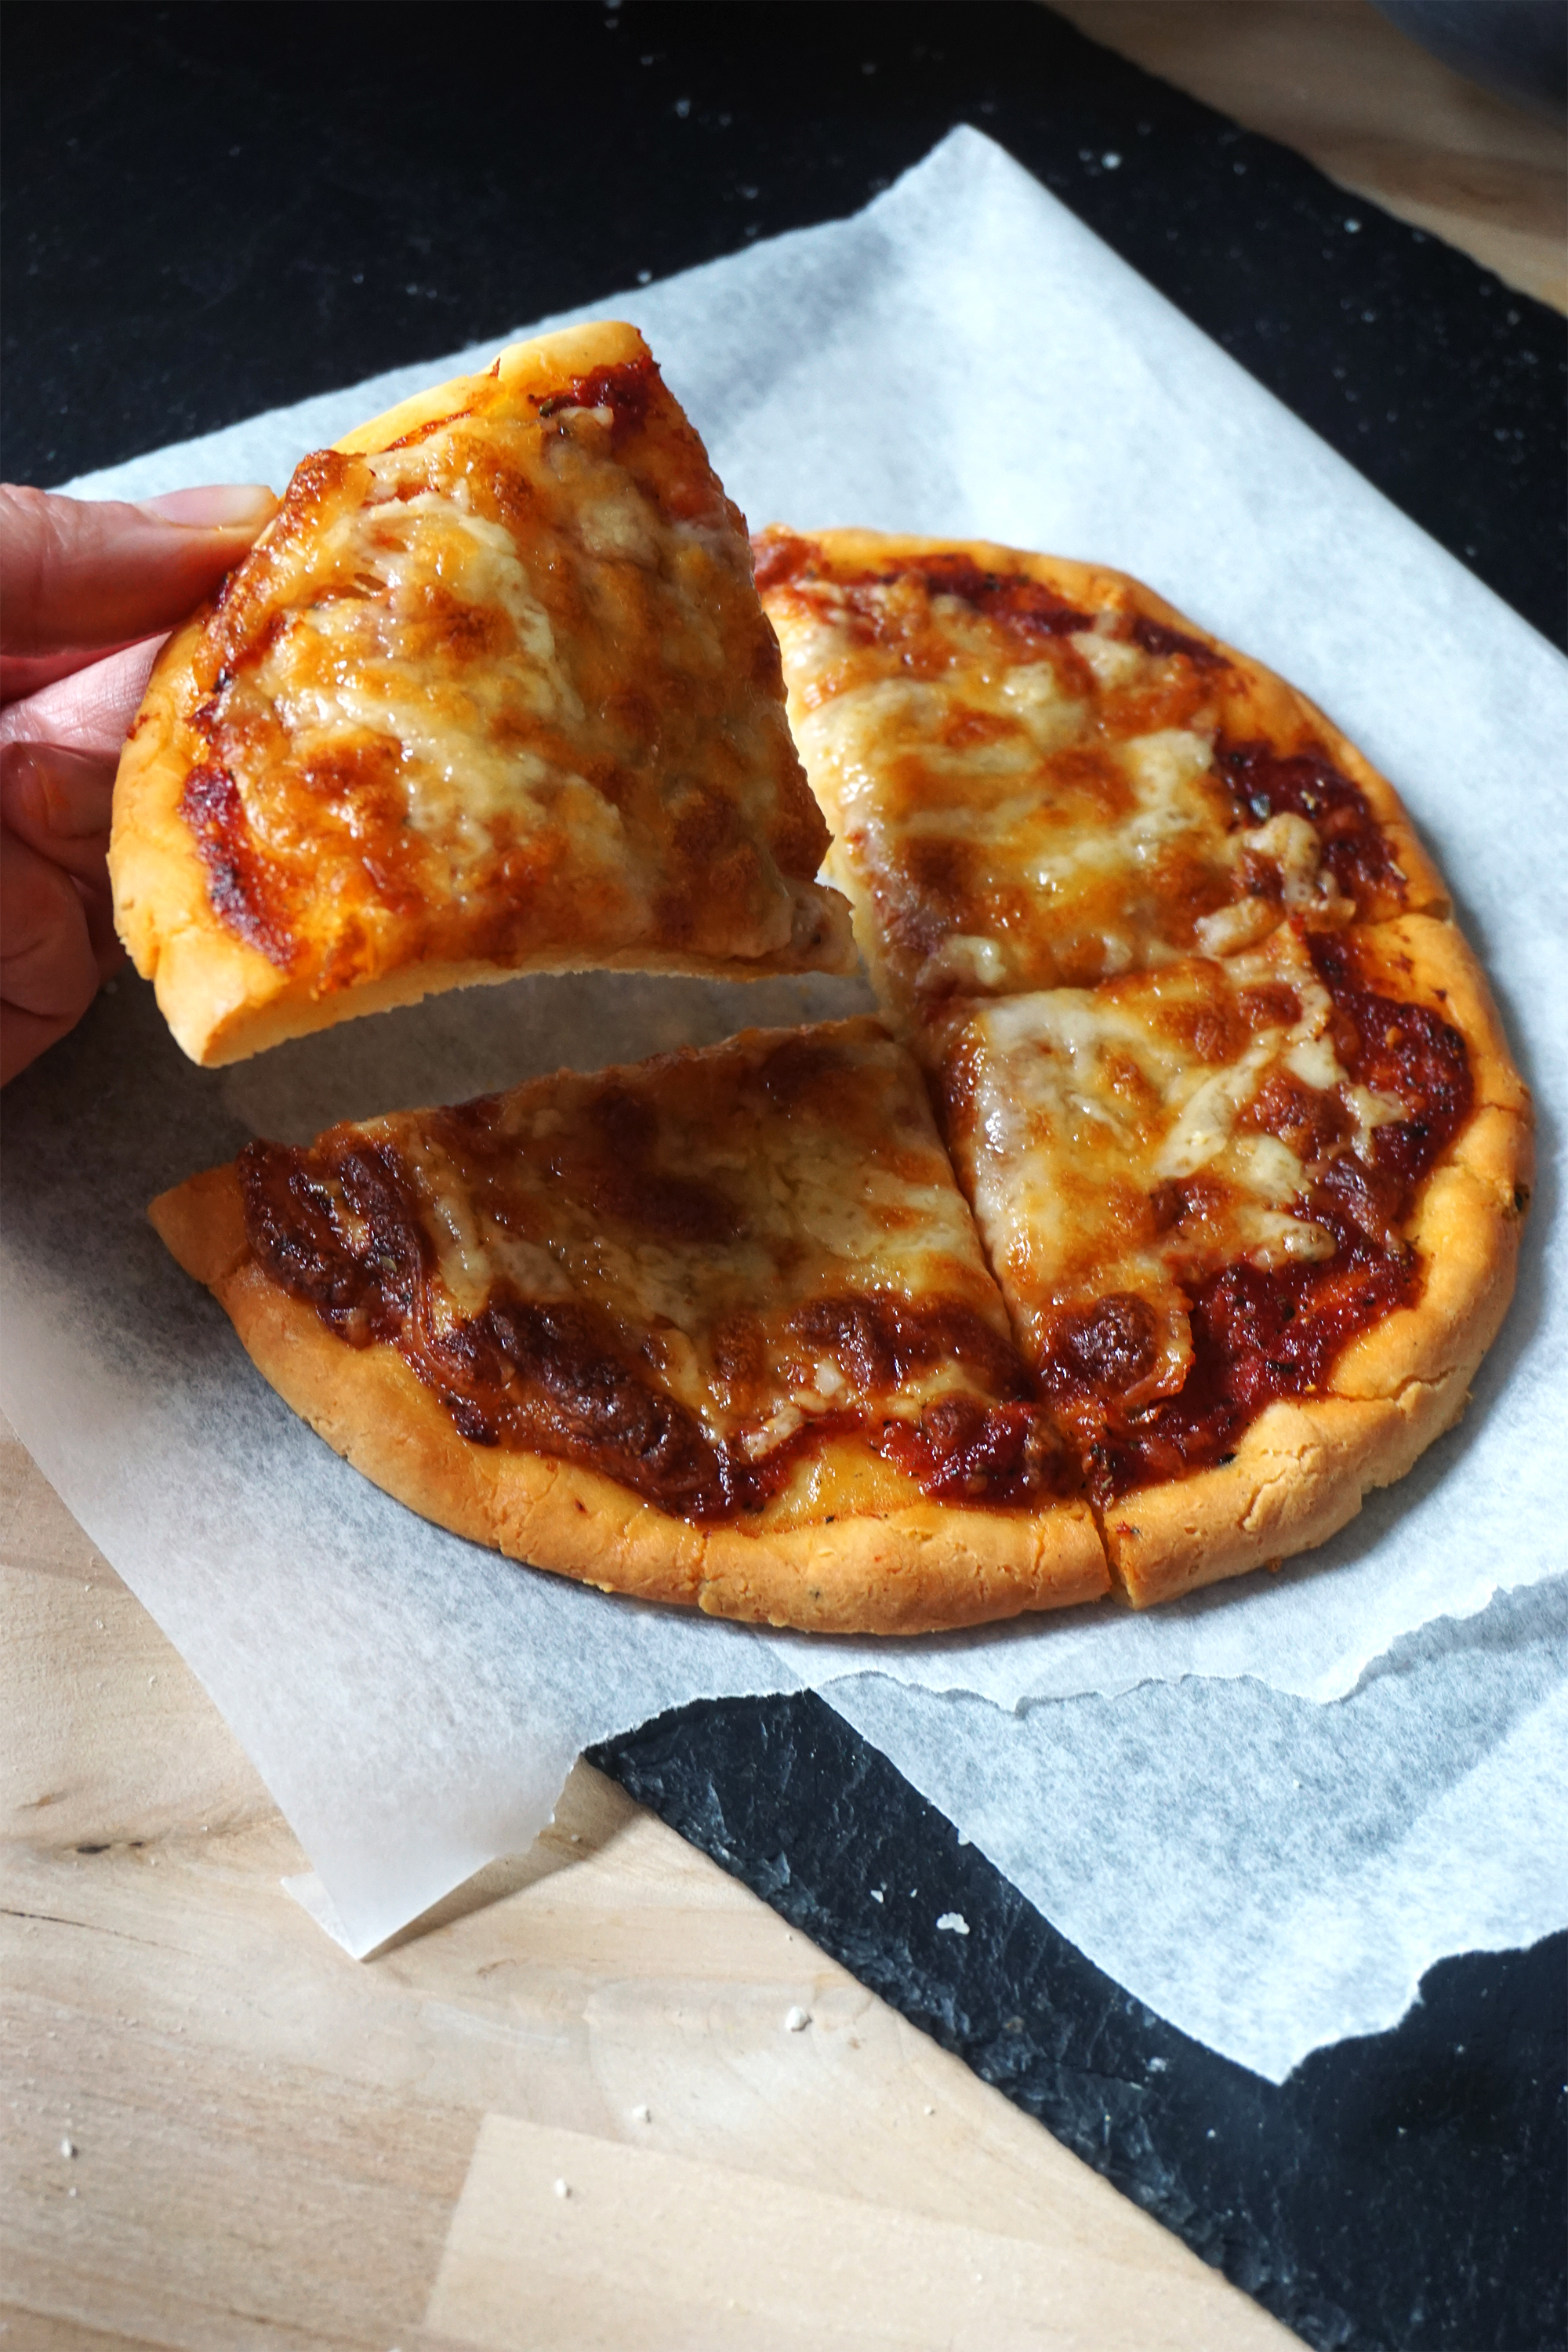
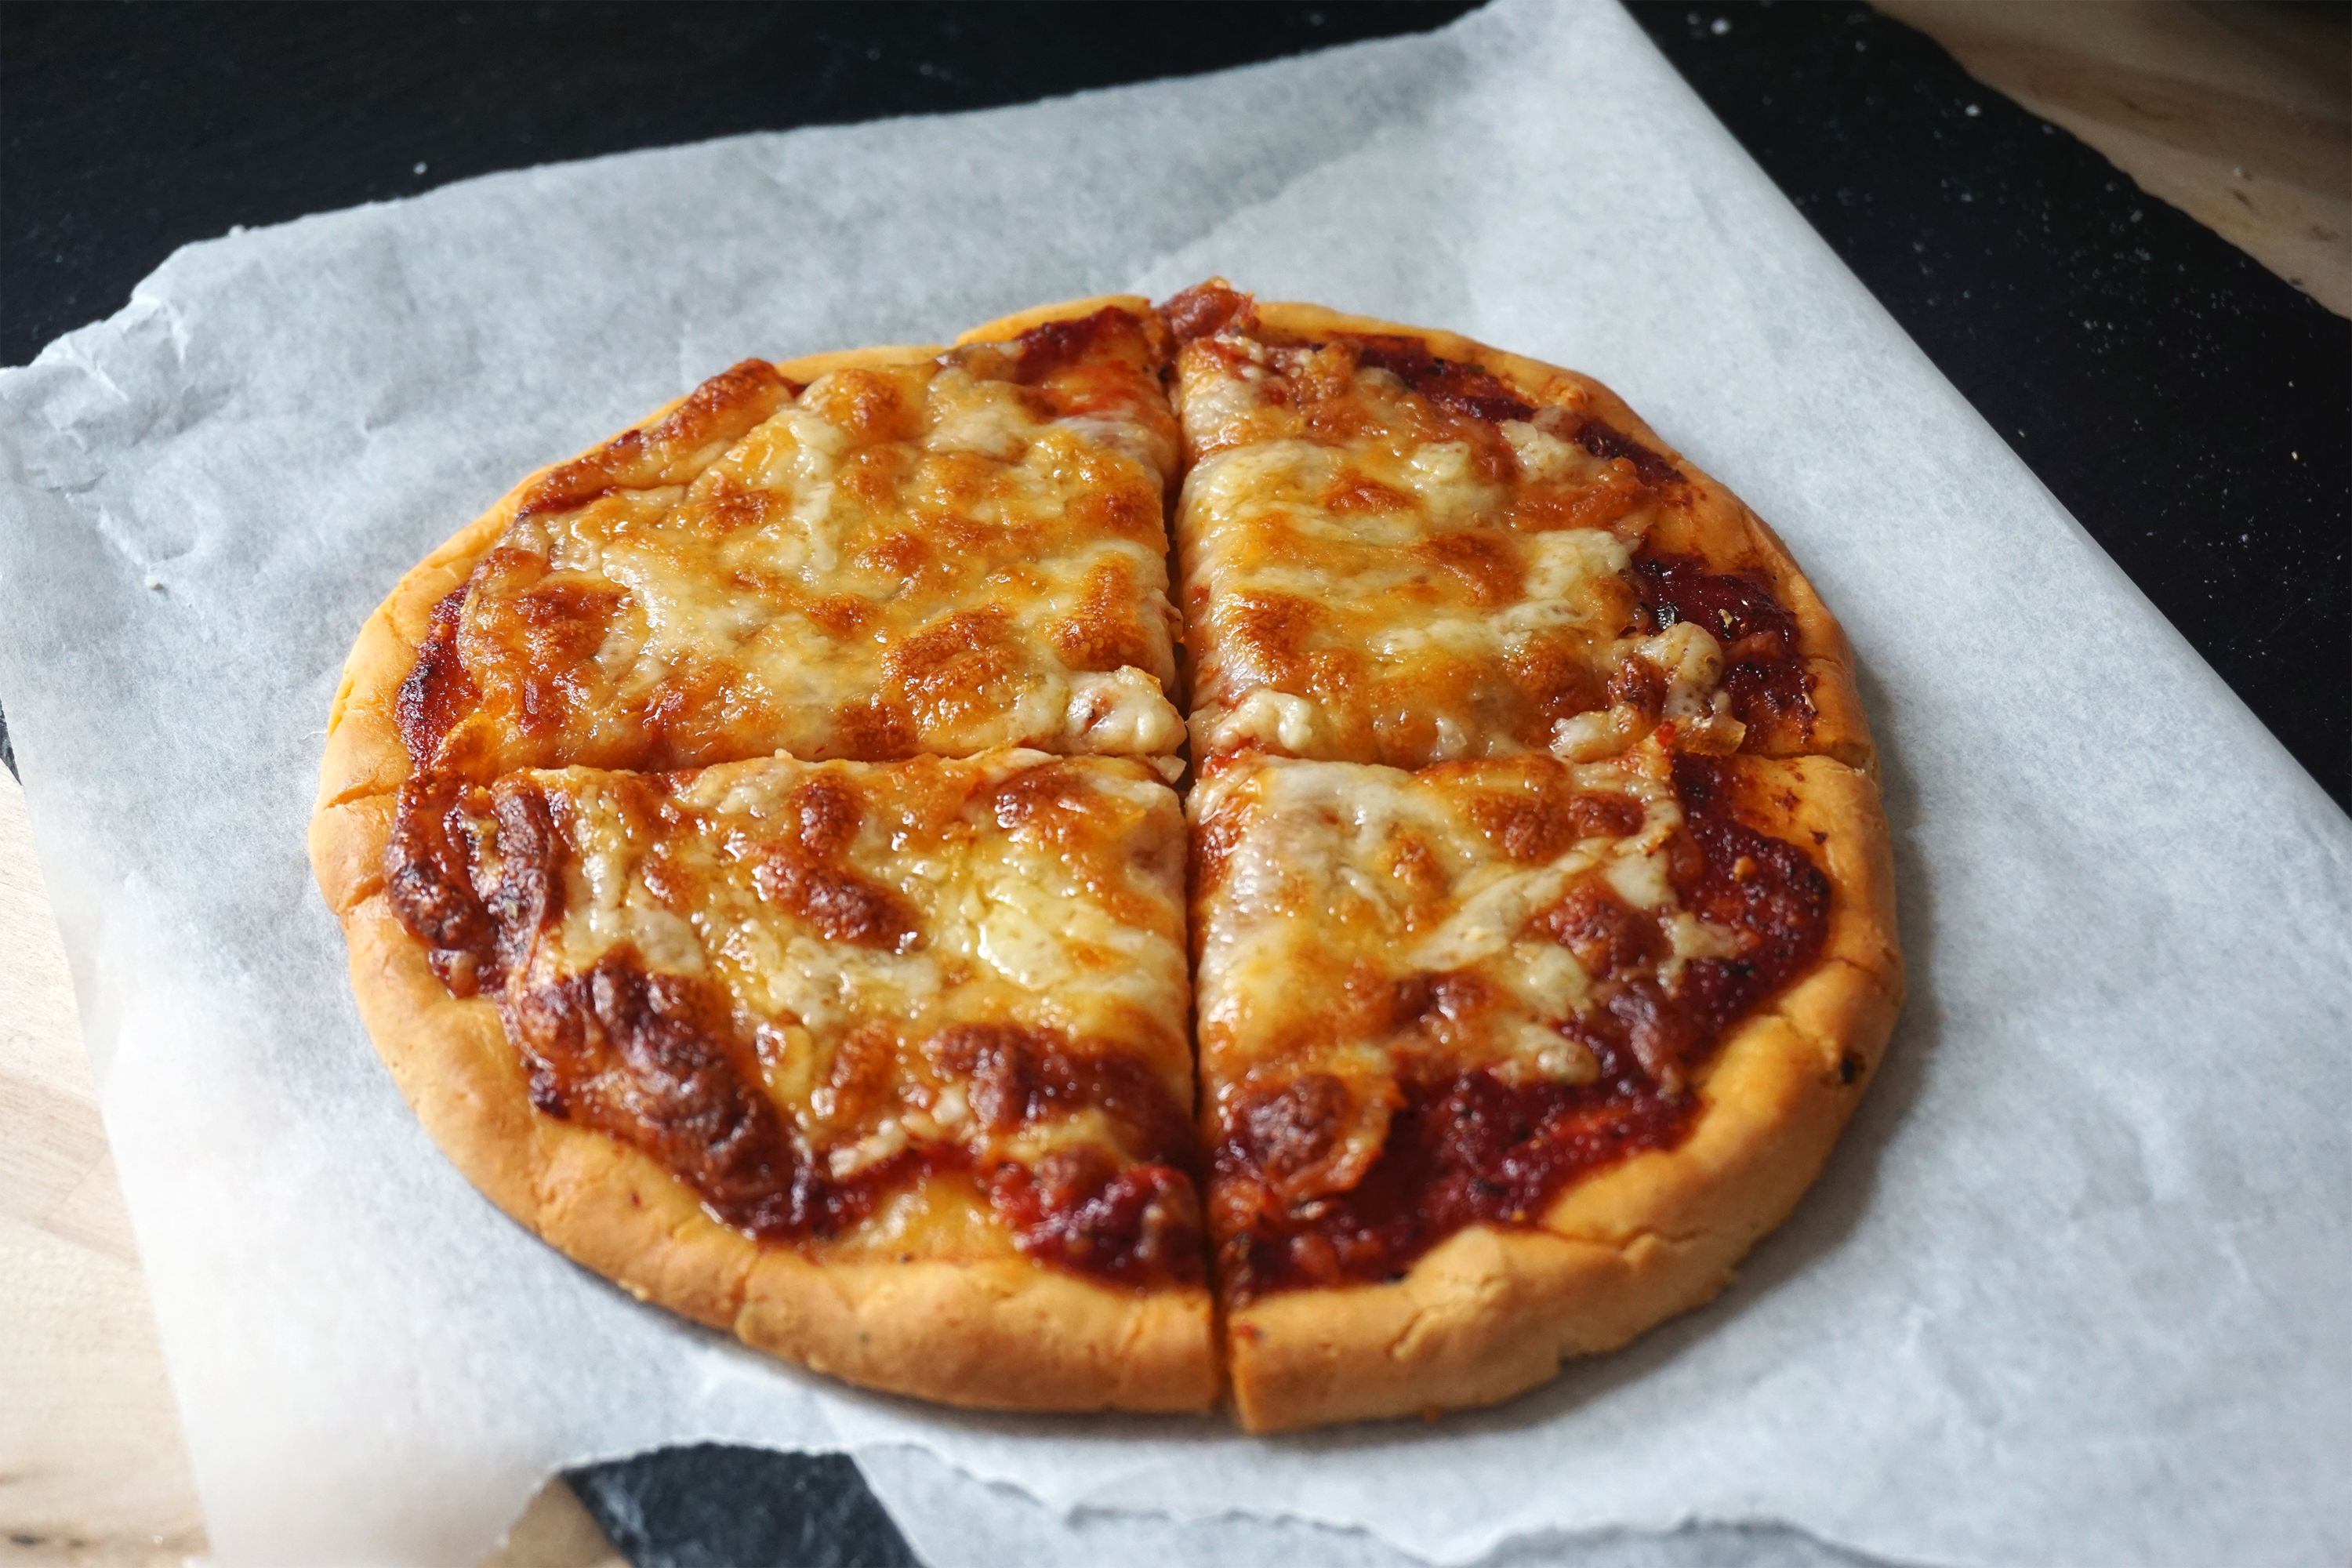
The original SOFT/DEEP PAN version:
Tips for an even better pizza base:
1. Let the dough rest. I recommend letting the dough rest before cooking. About one hour at room temperature or overnight in the fridge. After experimenting some more with this recipe, I find this yields by far the best texture. It adds a lot of airiness and fluffiness to the deep pan version. It may seem like an inconvenience, but the dough itself is incredibly quick to make so you can prepare it in advance the night before and let it rest in the fridge overnight. So when meal time comes the next day, it’s ready to pop in the oven without any hassle. 🙂
2. Add yeast. This one isn’t necessary, especially if you choose to cook it right away without resting the dough first. But if you do rest it and can have yeast, add 1 to 2 teaspoons of dry active yeast for an even better texture and flavour. Note: use the powdered kind that can be added in straight with the rest of the ingredients.
P.S: I also have a proper yeast risen yoghurt pizza dough recipe if you’re interested, which you can find HERE.
Easy gluten free yoghurt pizza dough recipe:

- 150g (1 cup) gluten free self-raising flour (I used Doves Farm)
- 145g (a bit less than ⅔ cup) plain Greek style yoghurt
- 1 Tbsp (15ml) olive oil
- Salt
- Black pepper
- Basic no-cook pizza sauce (recipe here)
- Extra mature cheddar
- Mozzarella (the semi-hard/low moisture kind that is often sold already grated)
- Passata (with salt, black pepper, cayenne pepper and dried basil added)
- Fresh mozzarella
- Parmesan
COOKING TEMP: 200C (390F)
COOKING TIME: 25 mins (10-15 mins for the crust alone + 10 mins with toppings)
THIN CRUST VERSION:
COOKING TEMP: 260C (500F) (or as high as your oven can go)
COOKING TIME: 10-15 mins (5-7 mins for the crust alone + 5-7 mins with toppings)
Also:
- I'm using strained yoghurt (Greek style yoghurt) which is a very thick type of yoghurt and works perfectly for this recipe. If using a thinner yoghurt, you may need to add a bit more flour (about 20g extra) depending on the texture.
- If using a plain flour blend without xanthan gum and self-raising agents, add 2 teaspoons of baking powder and 1 teaspoon xanthan gum (if possible).
Directions
FOR THE DEEP PAN VERSION:
- Preheat the oven to 200C (392F) and line a baking tray with parchment paper.
- Place all dough ingredients in a bowl and mix well with your hands until you form a ball.

- Flatten the dough on the baking tray (or separate the dough into more portions for smaller pizzas – I chose to make two medium sized ones).

- Smooth the edges with the back of a spoon or a knife.

- Bake in a preheated oven for 10-15 minutes or until the surface starts getting slightly crispy.
- Meanwhile, make the pizza sauce. My favourite thing to do is a very basic tomato purée based sauce with added olive oil, garlic powder and herbs, that only takes seconds to make. {recipe here}
- Take it out of the oven and add the sauce and toppings.

- Put it back in the oven for another 10 minutes or until the cheese turns golden brown.
FOR THE THIN CRUST VERSION:

PREPARE THE DOUGH:
- Pre-heat your oven to 260C (500F) (or as high as your oven can go) and let your baking tray/pizza stone heat up in there too. The secret to a perfect crispy restaurant-style pizza is a very hot oven and tray.
- Mix your the yoghurt and flour together in a bowl with some black pepper and a generous amount of salt.
- Knead the dough: lay a sheet of baking paper on your work surface, sprinkle some extra flour and tip your dough onto it, sprinkling a little more on top (as seen in the pictures above). Then, with your hands, knead the dough briefly until you have a smooth dough ball. It should still be a bit sticky, but easy to handle. NOTE: it shouldn’t be dry and cracking. If this happens, add a tiny bit of extra olive oil or yoghurt to fix it.
FLATTEN / SPREAD THE DOUGH:
- Sprinkle a little extra flour on your work surface (to prevent your pizza base from sticking to it) and spread the dough using your fingers until it’s very thin. Keep adding a bit more flour on top if necessary as you go along.
- Run a spatula underneath your pizza base to unstick any spots that may have stuck and push a bit of flour underneath if needed.
BAKE YOUR PIZZA:
- Transfer your pizza base (including the baking paper) onto your hot, pre-heated baking tray and cook for 5-7 minutes.
- Then take it out, peel off the baking paper and place your part-baked pizza base directly on the tray.
- Add your sauce and toppings. Note: I opted for passata with added salt, black pepper, cayenne and dried basil + fresh mozzarella and a tonne of grated parmesan. Very simple, but super tasty! 🙂
- Cook for another 5-7 minutes, until the cheese is melted and the edged are super crispy.

If you decide to give it a try, I’d love to know what you think of it in the comments! 🙂
Kimi x
Related posts:
Basic Easy Pizza Sauce {recipe here}
Dairy Free Yoghurt Pizza Dough {recipe here}
–
For simple healthy meal ideas and general food inspiration, you can find me on:

Looks so easy! Will definitely try
Love this idea. Tried it tonight, but I put the dough in muffin tins and kind of made mini deep dish pizzas. The crust was great! I used Bloomfield gluten free pizza dough mix (USA) and it worked really well.
Thanks, I’m glad you liked it! And making mini pizzas in muffin tins sounds like a really good idea, I’ll have to try that next time! 🙂
Hi Kimi, just wanted to say thanks..,honestly had given up on pizza after the store bought GF pizza crusts :-/ this was simple enough to give it a go….honestly I think one of the nicest pizza bases I’ve had regardless of GF!!! I used doves self-raising too and can’t have dairy so Koyo plain coconut yogurt (same measurement) and chucked in some oregano and basil as well as the bits you list….it was so good!!! Thank you very much for sharing this simple recipe 🙂
Thank you so much for the feedback! I’m glad to hear you liked it and that it worked just as well with dairy free yoghurt. 🙂 It’s crazy how simple it is and yet so good isn’t it? I haven’t bought any pre-made pizzas ever since I made this post. 😀
I’ve tried this recipe about 3 times now but I’m struggling with my dough. I use Doves Farm self raising flour and natural greek yog – I follow the amounts above but it all just crumbles and doesn’t want to stick. The pizza tastes delicious once done but my edges still look crumbly and awful! Any ideas what I’m doing wrong?
Hmm that’s odd, I’ve never had that problem before. Does it feel crumbly/like it’s not sticking together before cooking as well or just once cooked? Is it just the edges that fall apart or the whole thing? Some things I can think of are:
1) Maybe the dough needs to be kneaded a bit longer. The dough should be relatively sticky (not so much that it’s hard to handle, but it should be smooth and sticky). If it’s not, try adding a bit more oil (and/or yoghurt).
2) Do you use full fat or low fat Greek yoghurt? Full fat is better in my experience.
3) Could the dough be spread too thinly? Maybe try making it a bit thicker.
4) If it’s just the edges, maybe wet your fingers a bit when smoothing the edges to help get rid of all the cracks properly.
Also, generally with gluten free pizza I find adding a good amount of pizza sauce helps the texture a lot. Hope one of these things help! hehe Let me know if you try it again. 🙂
THANK YOU SO MUCH FOR THE RECIPE .I THOUGHT MY PIZZA EATING DSYS WERE OVER.
Thanks so much for the feedback, I’m glad you enjoyed it! 🙂
Hi Kimi, have you ever tried making Hamentaschen dough from GF flours? I have a nice recipe for the filling (Mohn) from Tori Avey, but want to find an easy pastry recipe. I have a really easy non-GF one with half-and-half self raising flour and yogurt. I wonder if you know if it will work with GF flour? Have been off gluten for 3 months now and still learning! Best wishes
Hey I’m sorry for replying so late! I’ve never made that myself so I’m not sure, but it’s well worth a try. Let me know how it turns out if you do. I’ll have to put this on my to-try list at some point. 🙂
The best gluten free pizza I have ever had, so soft and tasty. I added some garlic powder to the base and 3ml of Apple cider vinegar because I usually add this when I bake my bread. Baked it 10 mins then flipped it over and put toppings on that side so it wouldn’t be soggy. Perfect many thanks!!
I’m so glad to hear you enjoyed it, thanks for the feedback. ? And flipping it over is such a good idea by the way, I’m definitely trying that next time! ?
Pingback: Gluten Free Thin Crust Yoghurt Pizza / A Yeast Risen, Upgraded Version ? - Kimi Eats Gluten Free
I love this recipe I love that you was so clear I love the taste of the pizza
I love this recipe I love that you was so clear I love the taste of the pizza
Hey, would you mind if I share your blog with my twitter group? There’s a lot of folks that I think would enjoy your content. Please let me know. Thank you.
Love it! Thanks for sharing. All I need now is some decent lactose free cheese and I won’t feel left out at all when the family have pizza!
I have tried this with full-fat coconut yogurt for a dairy free option, and the crust turns out delicious— I did add a tablespoon of psyllium husk powder for extra fiber and chew. Such a great option and so much better then a packaged version! I will try your quick sauce- thanks for posting!
I’m so glad to hear you enjoyed it! Adding some psyllium husk sounds like a great idea, I’ll have to give this a try at some point. 🙂
This was the best and tastiest recipe for a gluten free pizza dough I ever tried, and so simple to make. Thank you!
Aww thank you so much, I’m so glad to hear you enjoyed it! 🙂
I have a question about adding yeast; I have Allinson’s dry active powder, but the instructions say to add warm water in order to reactivate it; if I’m following your advised recipe , do I ignore this and add it straight to the dough? Thanks.