

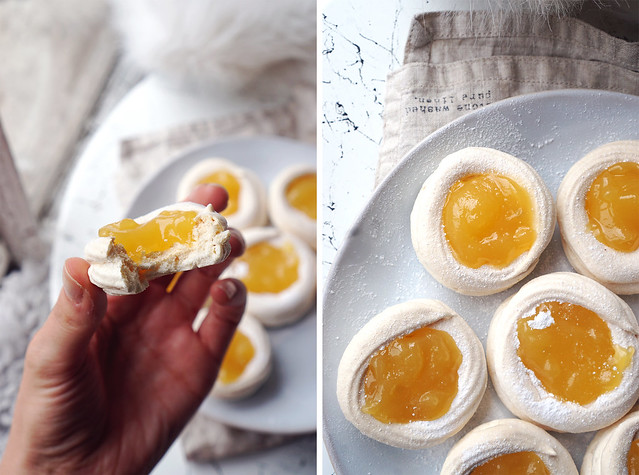
Some mini meringue nests I made yesterday filled with lemon curd. 🙂
I have to admit that I wasn’t a big fan of baked meringue when I was younger and I blame cheap shop bought meringues for putting me off. They tend to be so hard and is it just me or do they have a weird funky taste at times? But MY GOD does it make a world of difference when you make them fresh at home. The texture just doesn’t compare; they’re so light, crisp and melt in your mouth.
They’re super easy to make as well and only require two ingredients: egg whites and sugar. You have to bake them on low heat for two hours so it’s something to bear in mind, but the preparation itself is very simple. We love having these as a tea time treat instead of cookies for a bit of change.
TIPS:
1. Use good quality fresh free range eggs. In my experience, old or cheap eggs (which tend to be old) often don’t whip up properly.
2. Use room temperature eggs. In the UK we don’t refrigerate eggs, neither at home or in supermarkets, but for those who do, take your eggs out of the fridge in advance before making your meringue.
3. Make sure your whisk/paddle attachments and bowl are completely clean. Even just a tiny bit of grease can ruin your meringue.
4. Wipe your bowl and whisk/paddle attachments with a kitchen towel soaked in lemon juice or vinegar. This helps get rid of any residue of grease. I’ve seen many chefs recommend this and honestly it changed everything for me. Nearly all my meringue attempts used to fail until I started doing this.
5. Don’t use a plastic bowl or utensils as plastic is harder to wash and is more likely to have leftover grease stuck in small cracks. Stainless steel or glass is best.
6. Don’t let any egg yolk fall into the bowl when separating the egg whites. My favourite method to avoid this is to crack the egg into one hand and let the egg white dribble into the bowl through my fingers. Passing the egg yolk from shell to shell is the classic method, but it can lead to a shard accidentally poking the egg yolk and ruining your egg whites.
7. Be careful not to add the sugar too soon. Wait for the meringue to from soft peaks and slowly add the sugar one teaspoon at a time.
How to Make Meringue Nests:
- 2 egg whites
- 100g caster or granulated sugar
- Optional: flavourings and colourings
- Lemon curd
- Whipped cream
- Yoghurt
- Fruits
- Mousse
* All you need is 50g of sugar per egg white; multiply the recipe as needed.

Directions
- Wipe your bowl, utensils and whisk/paddle attachment with lemon juice or vinegar using a sheet of kitchen towel. This helps get rid of any speck of grease that could get in the way of your meringue whipping properly.
- Crack the eggs one at a time and carefully separate the white from the yolk while being very careful not to drop any egg yolk or shell into the mixing bowl.
- Mix on low/medium speed with a an electric hand mixer until it becomes creamy and forms soft peaks.
- Then at this point start adding the sugar, one teaspoon at a time, and keep mixing until the sugar has dissolved. You know you’ve reached the right consistency if the meringue forms peaks and you can basically hold the bowl upside down without the content spilling out.
- Line a baking tray with non-stick baking paper (do not grease the pan as it will ruin the meringue) and spoon the meringue on for rustic nests or you can also use a piping bag, as I did, to really control shape. Note: starting from the center, pipe it in a circular motion to create the base and then build up the sides to make a nest.
- Bake on the middle shelf of a pre-heated oven at about 100-110C (212-230F) for about 2 hours. Note: you may have to adjust the temperature depending on your oven. Keep an eye on them at first and if you see a bit of browning happening, turn the heat down. It can take some trial and error to figure it out.
- Let your meringue nests cool down and fill them up with whatever you’d like.
Hope you enjoy them! 🙂
Kimi x
